
If you searched for Raspberry Pi wireless display, you are probably trying to make a Raspberry Pi act like the screen that receives video from a phone or laptop. That can work, but a Pi is not a built-in Miracast, AirPlay, or Chromecast receiver out of the box.
What you can do depends on two things: the device that is sending the screen, and the software you add to the Pi. Some setups are quite usable. Some are more trouble than they are worth. The fastest way to avoid wasting an afternoon is to separate the methods that are realistic from the ones that sound nice but rarely connect cleanly.
Raspberry Pi Wireless Display: Quick Answer
Yes, a Raspberry Pi can work as a wireless display receiver, but not in a universal built-in way. Whether Raspberry Pi screen mirroring works depends on the sender device, the wireless display protocol being used, and the receiver software installed on the Pi.
Here is the short version:
- Raspberry Pi AirPlay receiver: Install software such as RPiPlay to receive AirPlay screen mirroring from Apple devices including iPhone, iPad, and Mac.
- Raspberry Pi Miracast receiver: Install Miracast-compatible receiver software such as lazycast to receive wireless display connections from supported Windows PCs and Android phones.
- Browser-based Raspberry Pi cast receiver: Run a browser receiver on the Pi and let you share your screens through a web link instead of relying on AirPlay, Miracast, or Google Cast compatibility.
For most users, the best method depends on the sender:
| Sender Device | Recommended Method |
|---|---|
| iPhone / iPad | AirPlay receiver |
| Mac | AirPlay receiver |
| Windows PC | RMiracast receiver |
| Android Phone | Miracast receiver or browser-based receiver |
| Mixed Devices | Browser-based Raspberry Pi cast receiver |
The most important thing to understand is that Raspberry Pi OS does not include native AirPlay, Miracast, or Google Cast receiving capabilities. To use Raspberry Pi as a wireless display, you must install receiver software that matches the device you want to mirror.
What Raspberry Pi Wireless Display Usually Means
The phrase "Raspberry Pi wireless display" can mean two different things, and the difference matters.
In this article, I mean this:
- the Raspberry Pi is connected to a monitor or TV by HDMI
- another device sends its screen wirelessly
- the Pi receives that screen and shows it on the larger display
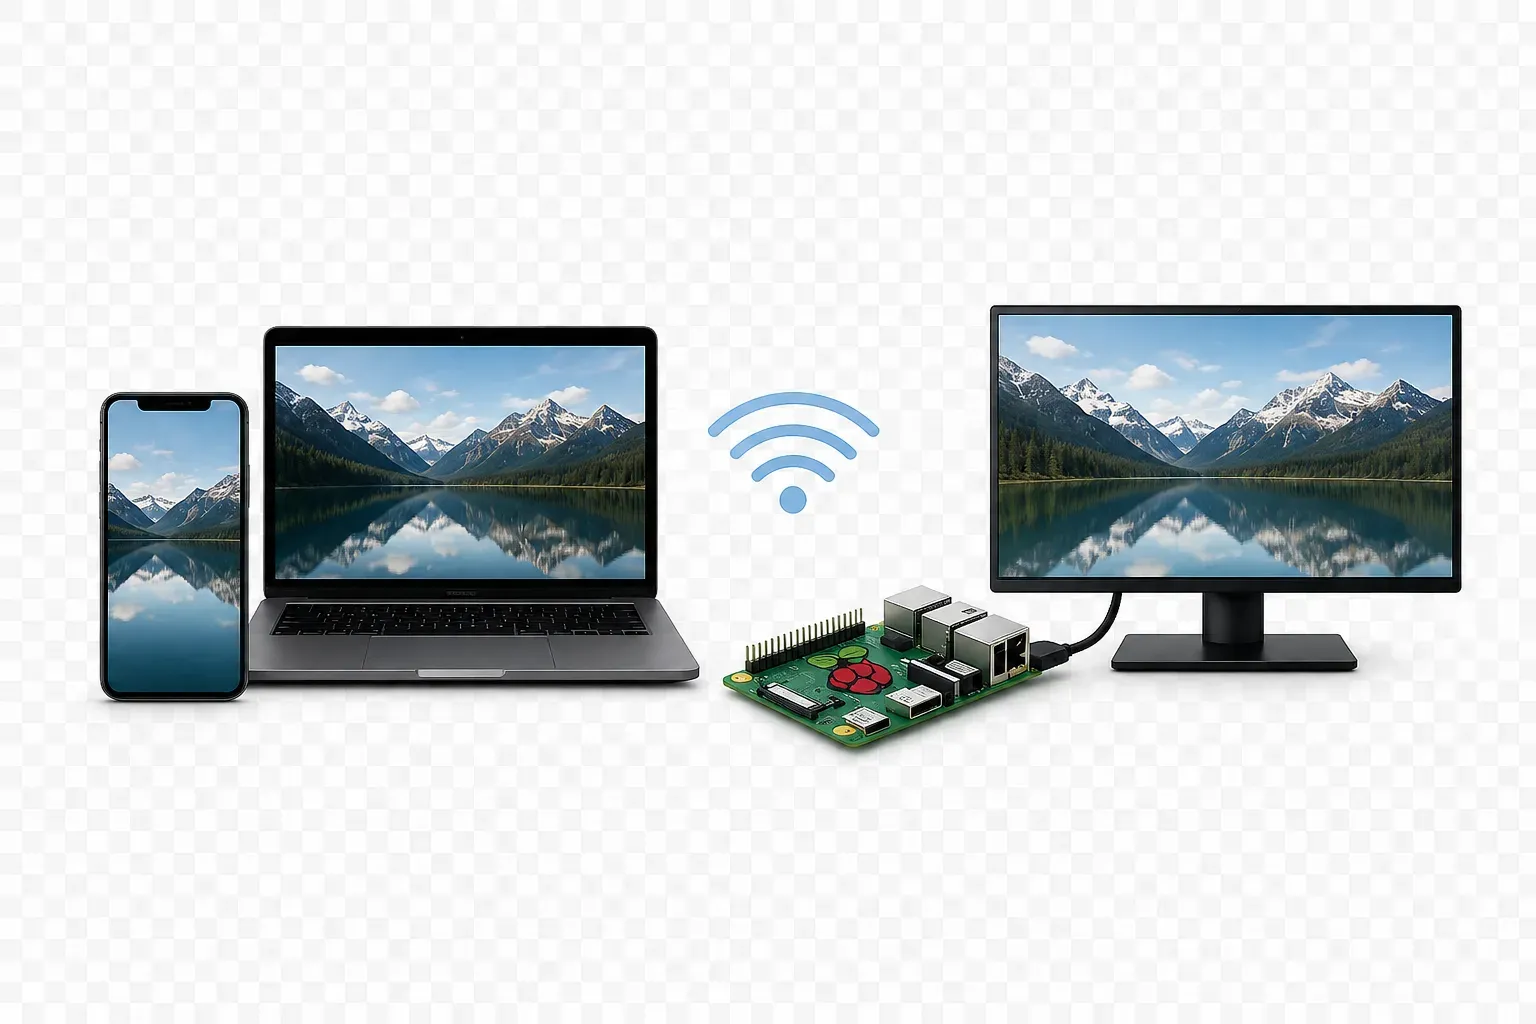
That is different from:
- a Pi sending its own desktop to another display
- a Pi streaming video files to another device
- remote control tools that let you view the Pi from a browser
For example, Raspberry Pi Connect is made for sharing the Pi's own screen outward. That is not the same as turning the Pi into the receiver for your phone or laptop.
What a Raspberry Pi Can and Cannot Receive Natively
Before installing receiver software, it helps to understand what Raspberry Pi can actually do on its own. Many tutorials make it sound as if Raspberry Pi behaves like a Chromecast, Apple TV, or Miracast display immediately after installation.
In reality, Raspberry Pi OS does not include native support for most mainstream wireless display protocols. Whether a connection works depends on matching the sender's protocol with compatible receiver software running on the Pi. Understanding that limitation first will save a significant amount of troubleshooting later.
A Raspberry Pi Is Not a Native Miracast Receiver
Raspberry Pi OS does not include a standard Miracast receiver role by default. If you want Miracast-style wireless display on a Pi, you usually need a separate project such as lazycast or a similar receiver tool.
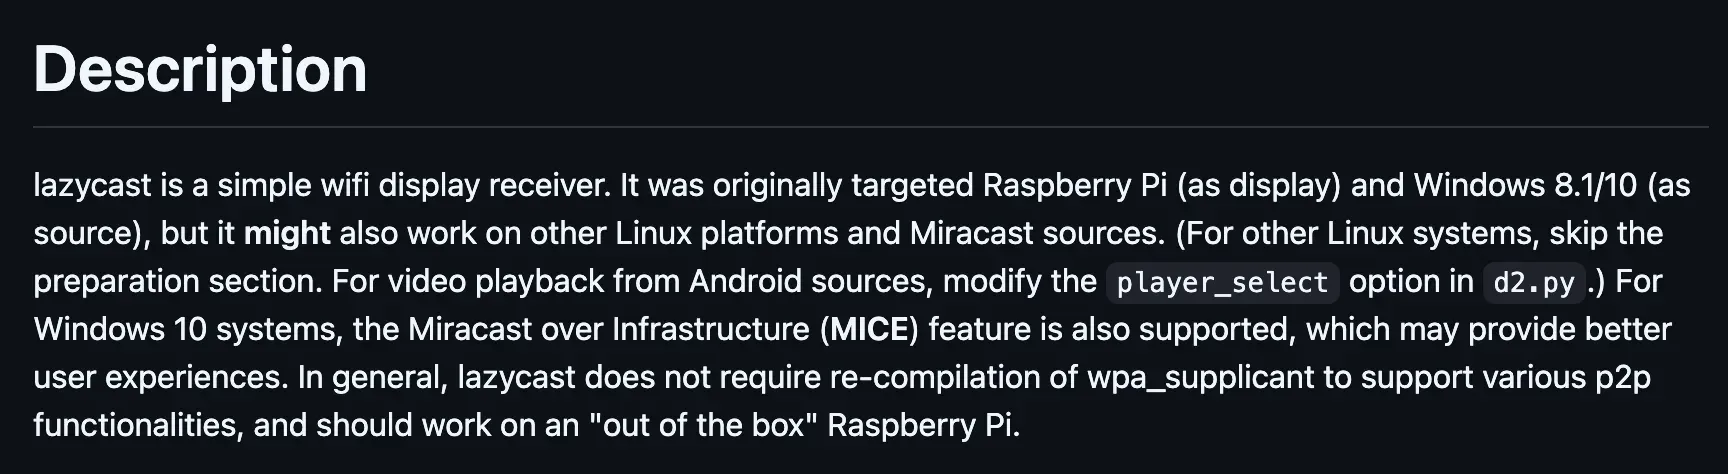
That matters because many Android phones and Windows laptops treat "wireless display" as a Miracast-type feature. If the Pi is not running software that can receive it, the sending device may never find it at all.
A Raspberry Pi Is Not a Native AirPlay Receiver
The Pi also does not behave like an Apple TV by default. For iPhone, iPad, or Mac mirroring, you need extra software on the Pi. One of the best-known options is RPiPlay, which its own project describes as an open-source AirPlay mirroring server for Raspberry Pi.
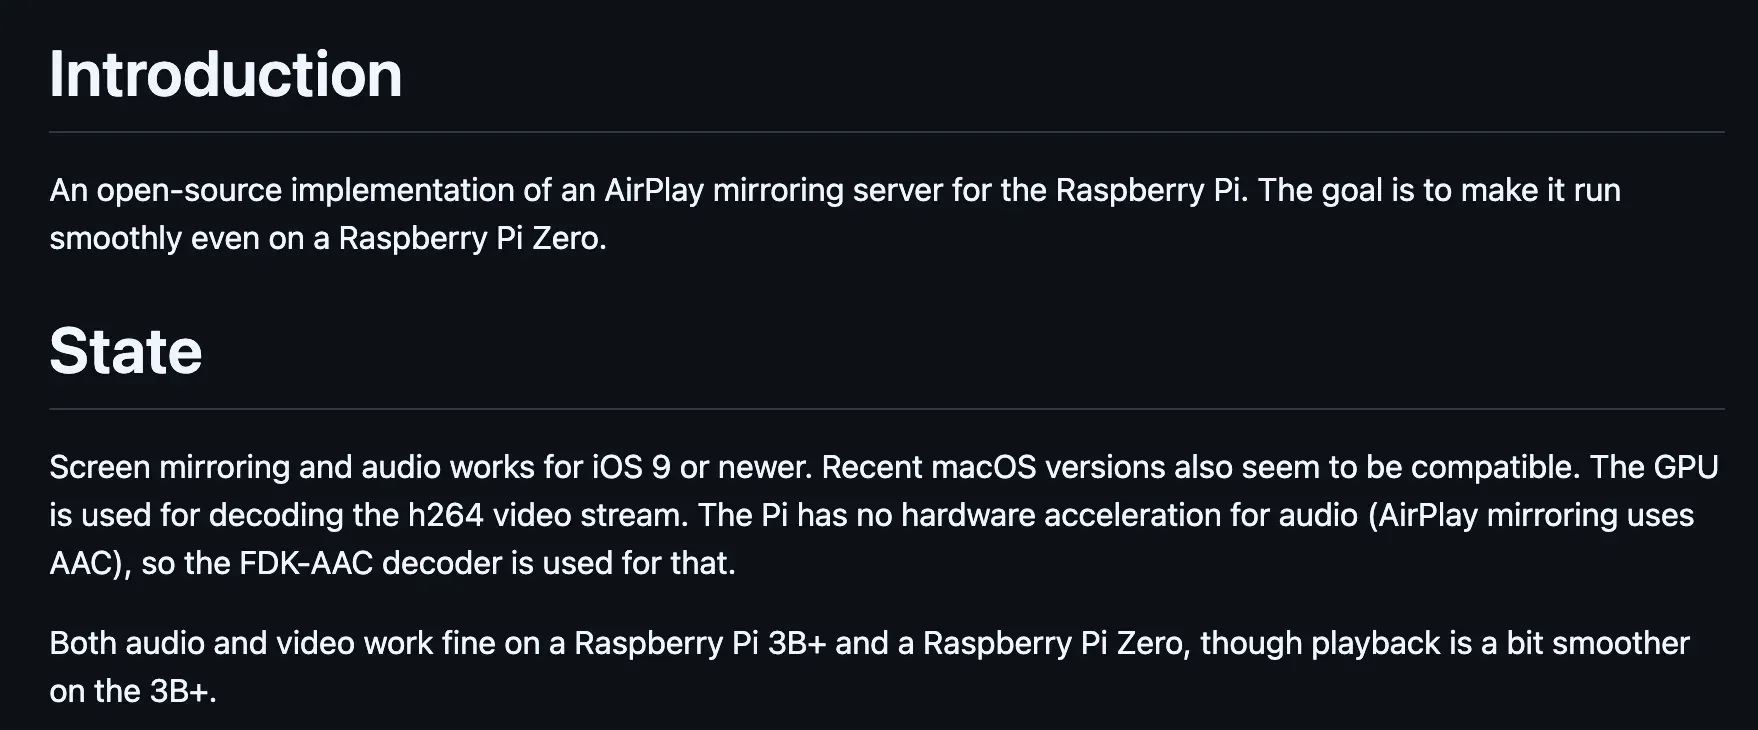
That makes Apple-device receiving possible, but it is still a software add-on, not a stock Raspberry Pi feature.
A Raspberry Pi Is Not a Native Google Cast Receiver
This is where many people get stuck.
Google Cast support on a Raspberry Pi is not as straightforward as AirPlay receiving with RPiPlay, and it is not something Raspberry Pi OS gives you as a normal built-in receiver mode. If your Android phone is using Cast rather than Miracast-style screen sharing, the Pi may not show up the way a Chromecast dongle or a Google TV device would.
That is why Android users often need to stop and check what their phone is actually trying to send.
In situations where AirPlay, Miracast, and Google Cast compatibility become difficult to manage, a browser-based receiver can sometimes be the simpler approach. Instead of making the Raspberry Pi emulate a specific casting protocol, the Pi simply runs a browser session and receives content through a web-based connection.
Best Raspberry Pi Wireless Display Method by Sender Device
The best choice depends more on the sender than on the Pi itself.
| Sending device | Best first method | Why |
|---|---|---|
| iPhone or iPad | RPiPlay | AirPlay mirroring on Pi is one of the clearest receiver setups available |
| Mac | RPiPlay | Good fit when you want Mac screen mirroring on a Pi-connected display |
| Windows laptop | Miracast receiver software such as lazycast | Closer match for Windows wireless display behavior |
| Android phone | Miracast receiver software first, browser receiver second | Android may use Miracast, Cast, or brand-specific screen sharing |
| Mixed devices | Browser receiver on the Pi | Simpler when native protocol matching becomes messy |
If you only need one answer, start by matching the sender type first. Do not begin with the Pi and hope every phone or laptop will treat it the same way.
How to Use Raspberry Pi Wireless Display With Apple Device
If your goal is to turn a Raspberry Pi into a Raspberry Pi airplay receiver, AirPlay-based mirroring is currently one of the most practical and widely documented approaches.
For most people, this is the cleanest place to start because AirPlay receiving on Raspberry Pi is well known and easier to explain than the Miracast side.
What You Need First
Before you begin, make sure:
- the Pi is already connected to a monitor or TV through HDMI
- the Pi is on the same local network as the Apple device
- Raspberry Pi OS is installed and updated
- you are comfortable installing a receiver app from a project such as RPiPlay
If your only goal is to mirror an iPhone or Mac to a spare monitor, this setup makes more sense than trying to copy the exact behavior of a Chromecast or smart TV.
Step 1. Prepare the Raspberry Pi
Set up the Pi like a small receiver box:
- connect the Pi to power, HDMI, and Wi-Fi or Ethernet
- boot into Raspberry Pi OS
- confirm the display is working normally before adding any mirroring software
If the Pi is already struggling with video output or Wi-Fi, screen mirroring will only make that more obvious.
Step 2. Install an AirPlay Receiver on the Pi
Install and configure RPiPlay or another AirPlay receiver project on the Pi. The point here is simple: the Pi needs software that can advertise itself to Apple devices as an AirPlay target.
Once installed, launch the receiver and keep it running on the Pi.
Step 3. Connect the Apple Device
On the iPhone, iPad, or Mac:
- open Screen Mirroring or AirPlay controls
- look for the Raspberry Pi receiver name
- select it and approve any pairing prompt
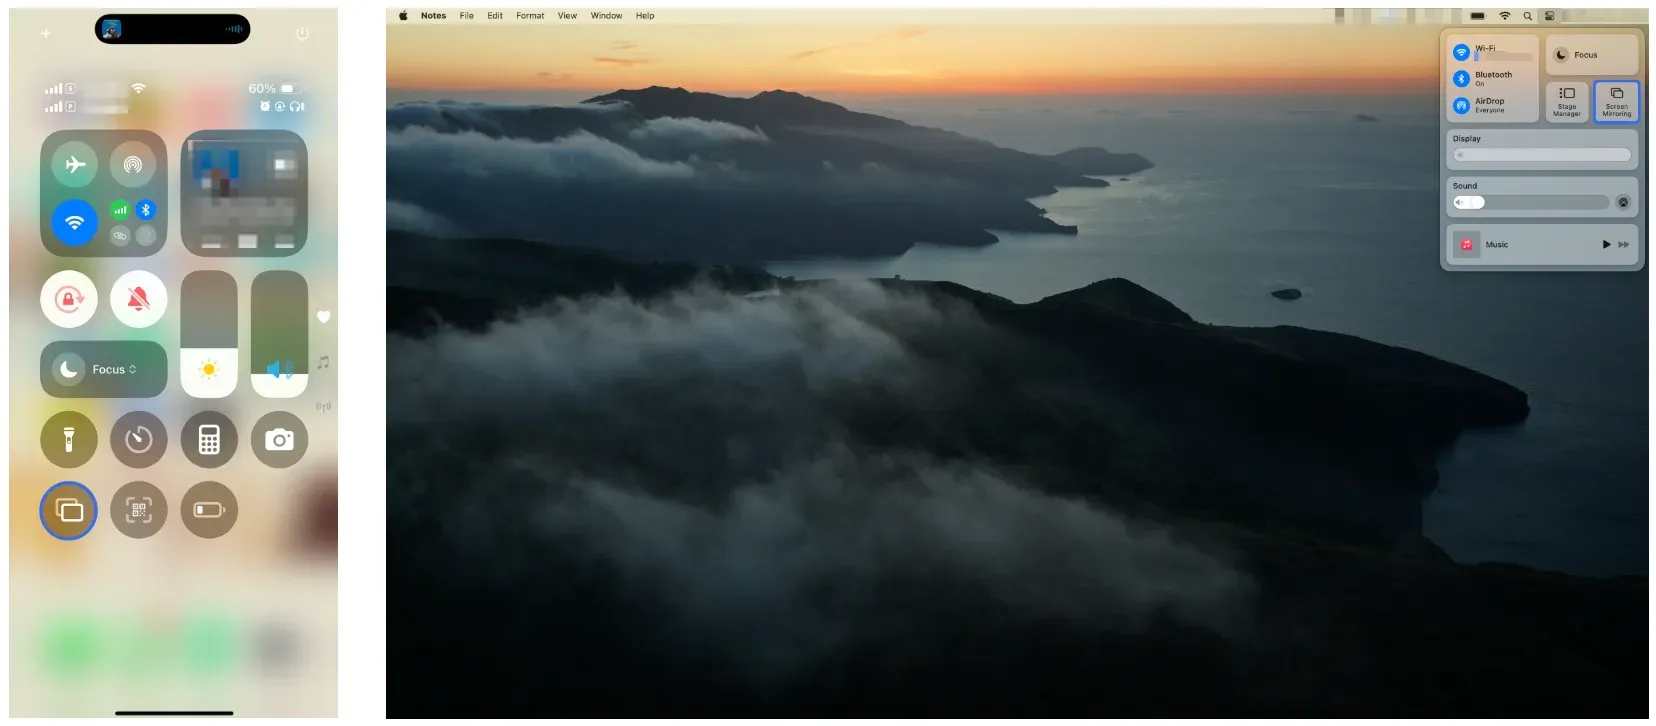
If the receiver appears and connects, the mirrored screen should show on the Pi-connected display.
Step 4. Test Before You Rely on It
Do a short test with:
- the Home Screen
- a presentation
- a simple app window
Do not start with protected video content. Basic screen mirroring is a better first test because it tells you whether discovery and display are working before you add media-specific limits to the problem.
How to Use Raspberry Pi Wireless Display With Windows or Android
If you want a Raspberry Pi Miracast receiver setup, Windows laptops and Miracast-compatible Android phones are usually the easiest devices to test with.
Use Miracast-Style Receiver Software on the Pi
If your sender is a Windows laptop, or an Android phone that supports Miracast-style screen sharing, a project such as lazycast is the first thing to look at. Its own README describes it as a simple wireless display receiver originally aimed at Raspberry Pi as the display and Windows as the source.
That is useful because it tells you exactly what kind of job the tool is trying to do.
The basic idea is:
Step 1. Install the receiver software on the Pi.
Step 2. Connect the Pi to the display you want to use.
Step 3. Keep the Pi on the same local network, or follow the receiver project's setup instructions if it uses Wi-Fi Direct behavior.
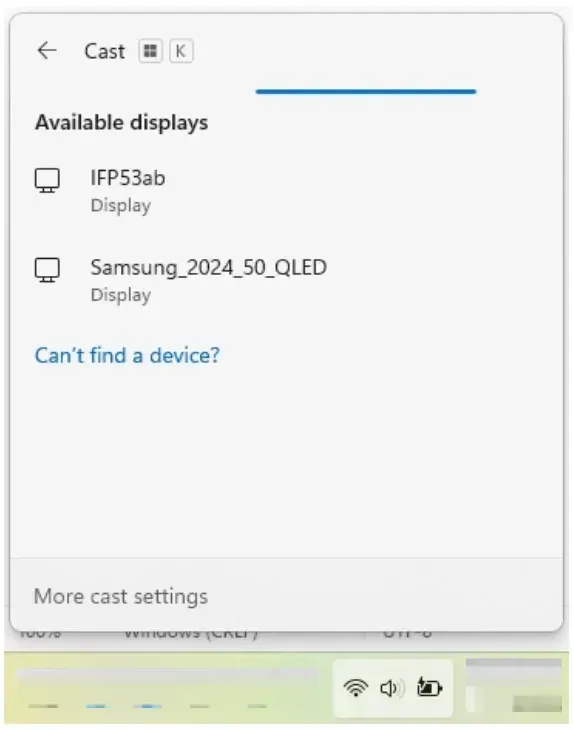
Step 4. On the Windows PC, open Connect to a wireless display or press Windows + K.
Step 5. On an Android phone, open the screen-sharing feature. The name may be Smart View, Cast, Screen Cast, or Wireless Display depending on the brand.
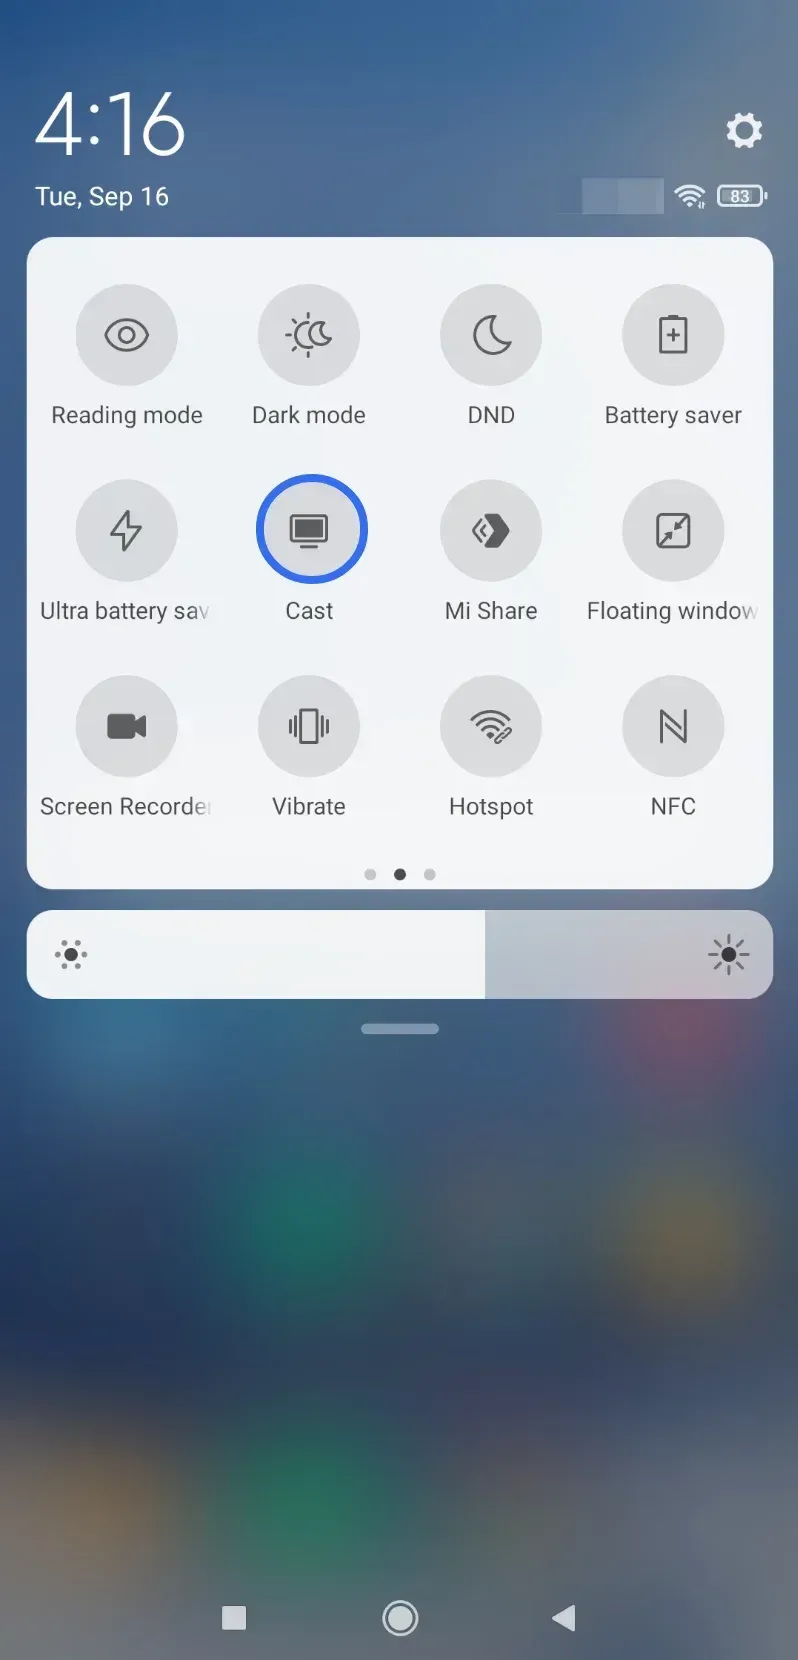
Step 6. Select the Pi if it appears and test the connection.
The key point is not that Miracast on Pi is impossible. It is that it is more project-dependent and more fragile than many people expect.
Why Android Screen Mirroring to Raspberry Pi Often Fails
Android can be the most frustrating platform for Raspberry Pi screen mirroring because there is no single casting standard that every manufacturer follows.
For example, I tested a Xiaomi phone and an OPPO phone that could both discover a Miracast receiver on the same network without much trouble. A Google Pixel, however, behaved differently because Google's ecosystem leans much more heavily toward Google Cast instead of Miracast.
Manufacturers also rename the feature. Depending on the device, you might see options such as Wireless Display, Smart View, Screen Cast, Cast, or something entirely brand-specific. Two Android phones sitting on the same desk can appear to offer the same feature while actually using different underlying technologies.
This is often the reason one phone finds the Raspberry Pi immediately while another never detects it at all.
Before troubleshooting the Pi, verify what your Android device is actually trying to use:
- Miracast-style wireless display
- Google Cast
- a manufacturer-specific implementation
If the phone is primarily looking for a Google Cast target, a Raspberry Pi configured as a Miracast receiver may never appear, even when the receiver software is running correctly.
How to Use Raspberry Pi as a Browser-Based Wireless Display
There are cases where the simplest answer is not AirPlay or Miracast at all.
If your goal is just to show a phone screen in a browser window on the Pi, a browser-based receiver can be easier to manage than trying to make the Pi behave like every native casting standard at once. This is especially useful in mixed-device rooms where one person has an iPhone, another has Android, and someone else brings a Windows laptop.
A tool such as PigeonCast fits this narrower role better than a native-casting expectation does. In that setup, the Pi is running the receiving browser session, and the sender connects to that session instead of hunting for built-in Cast or AirPlay support from Raspberry Pi OS itself.
That does not make browser receiving the best answer for every case. It just makes it a sensible one when native receiver matching is the real problem.
How to mirror an phone to Raspberry Pi through a browser-based receiver:
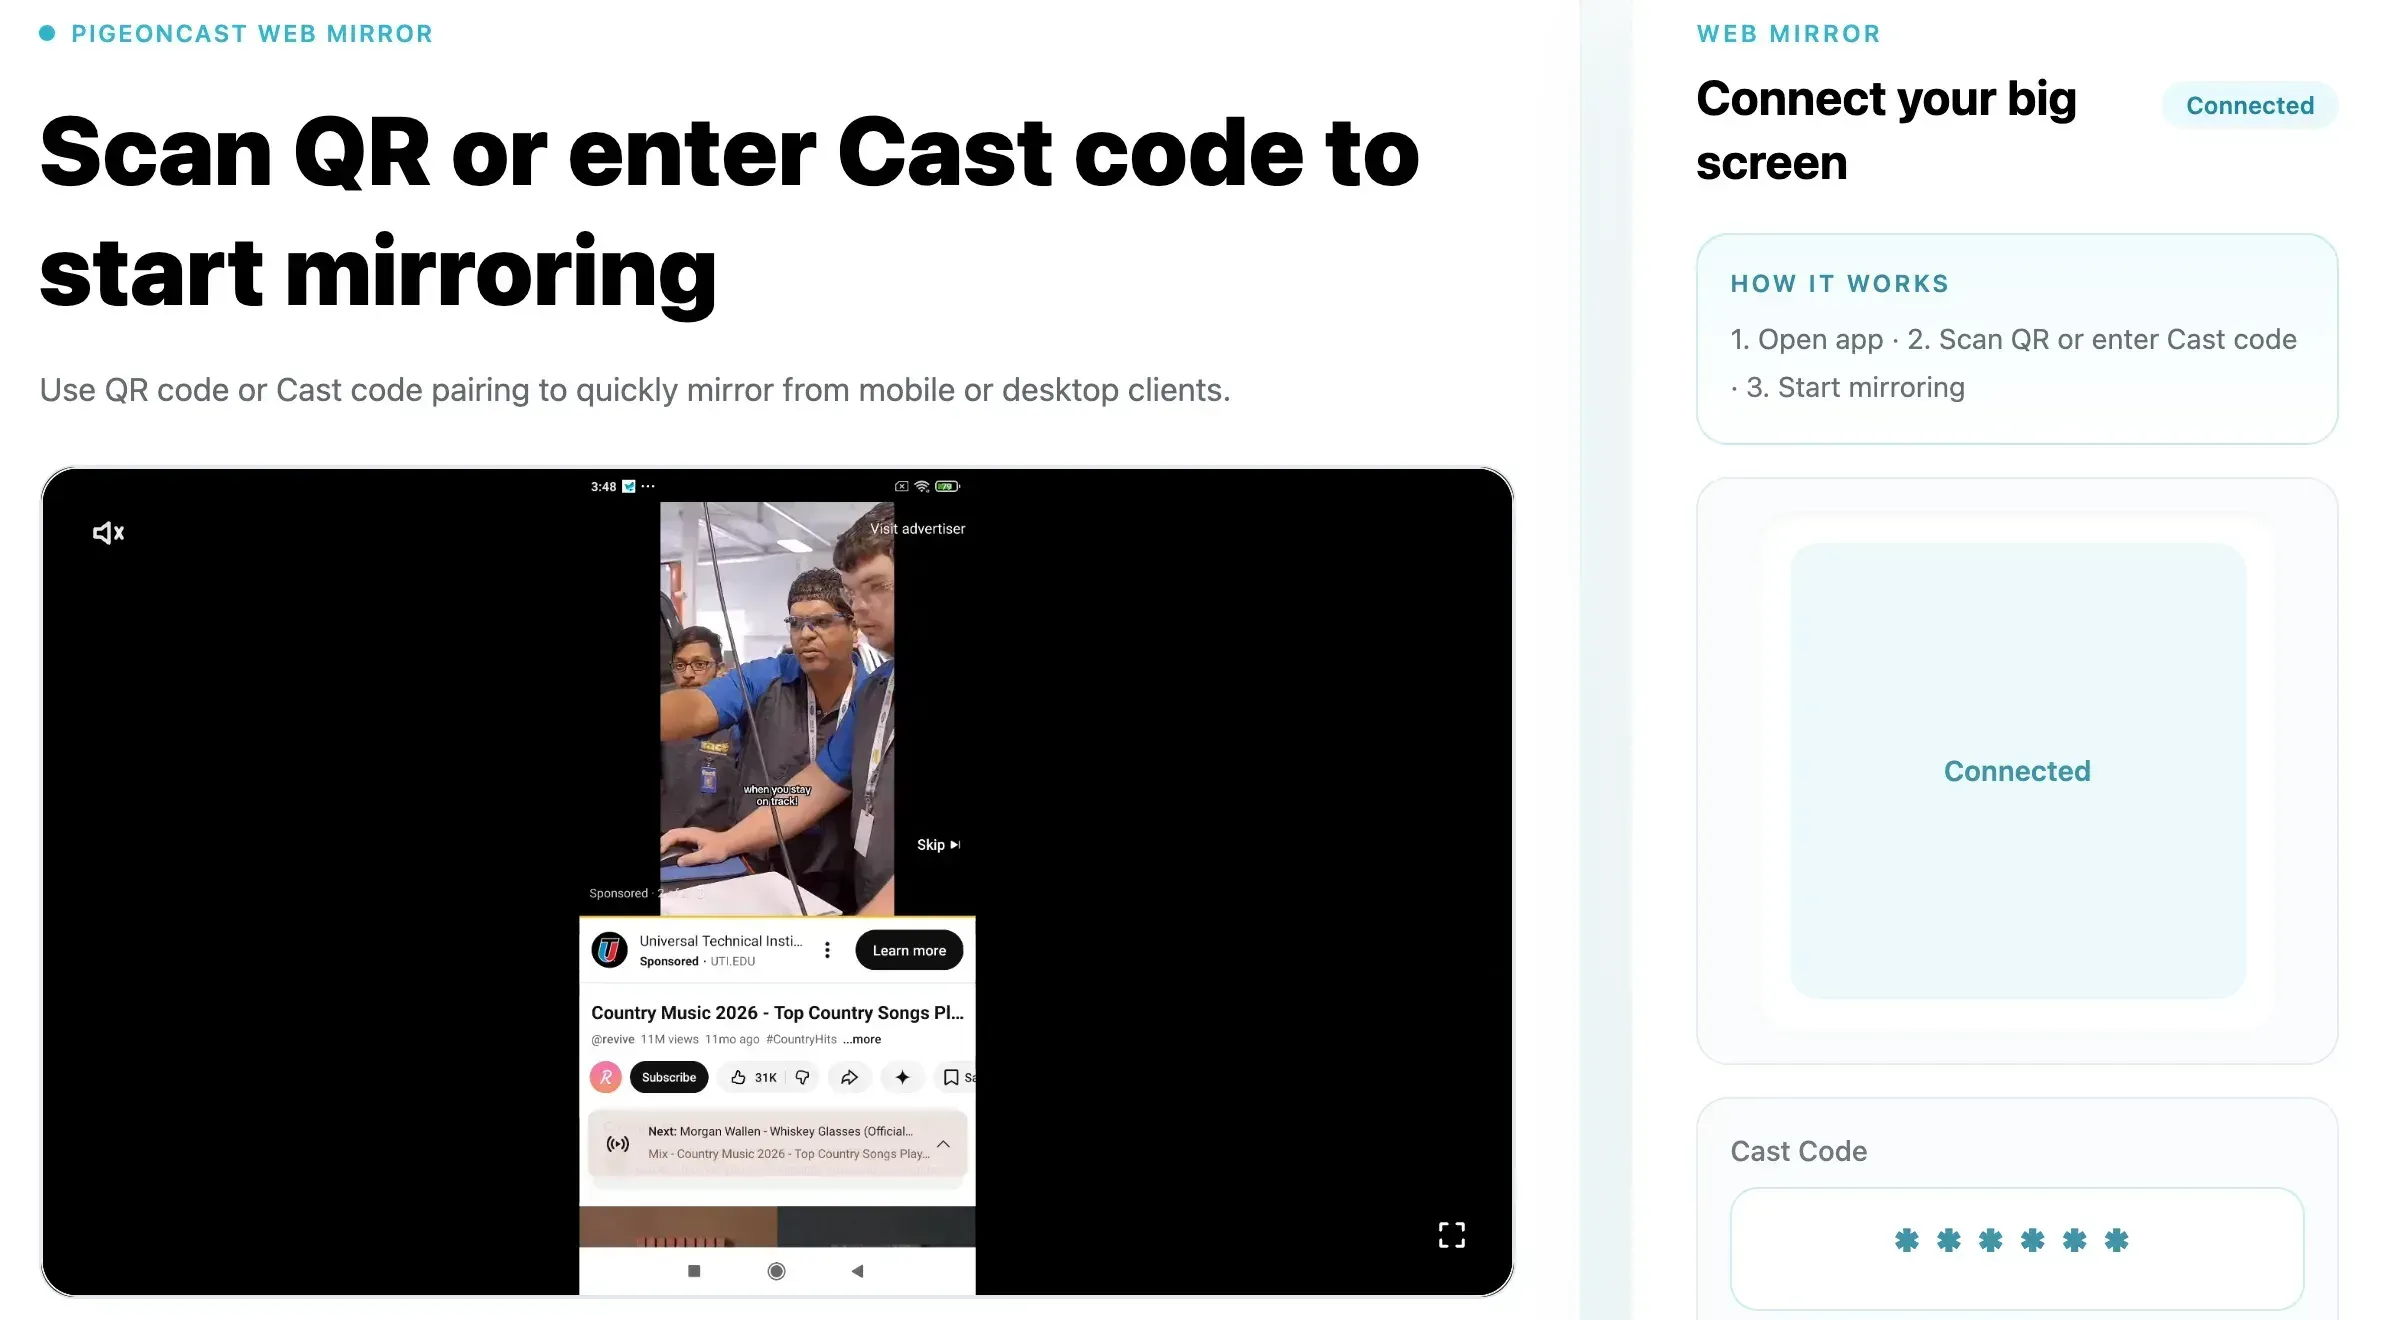
Step 1. Launch Chromium or another supported browser on the Raspberry Pi.
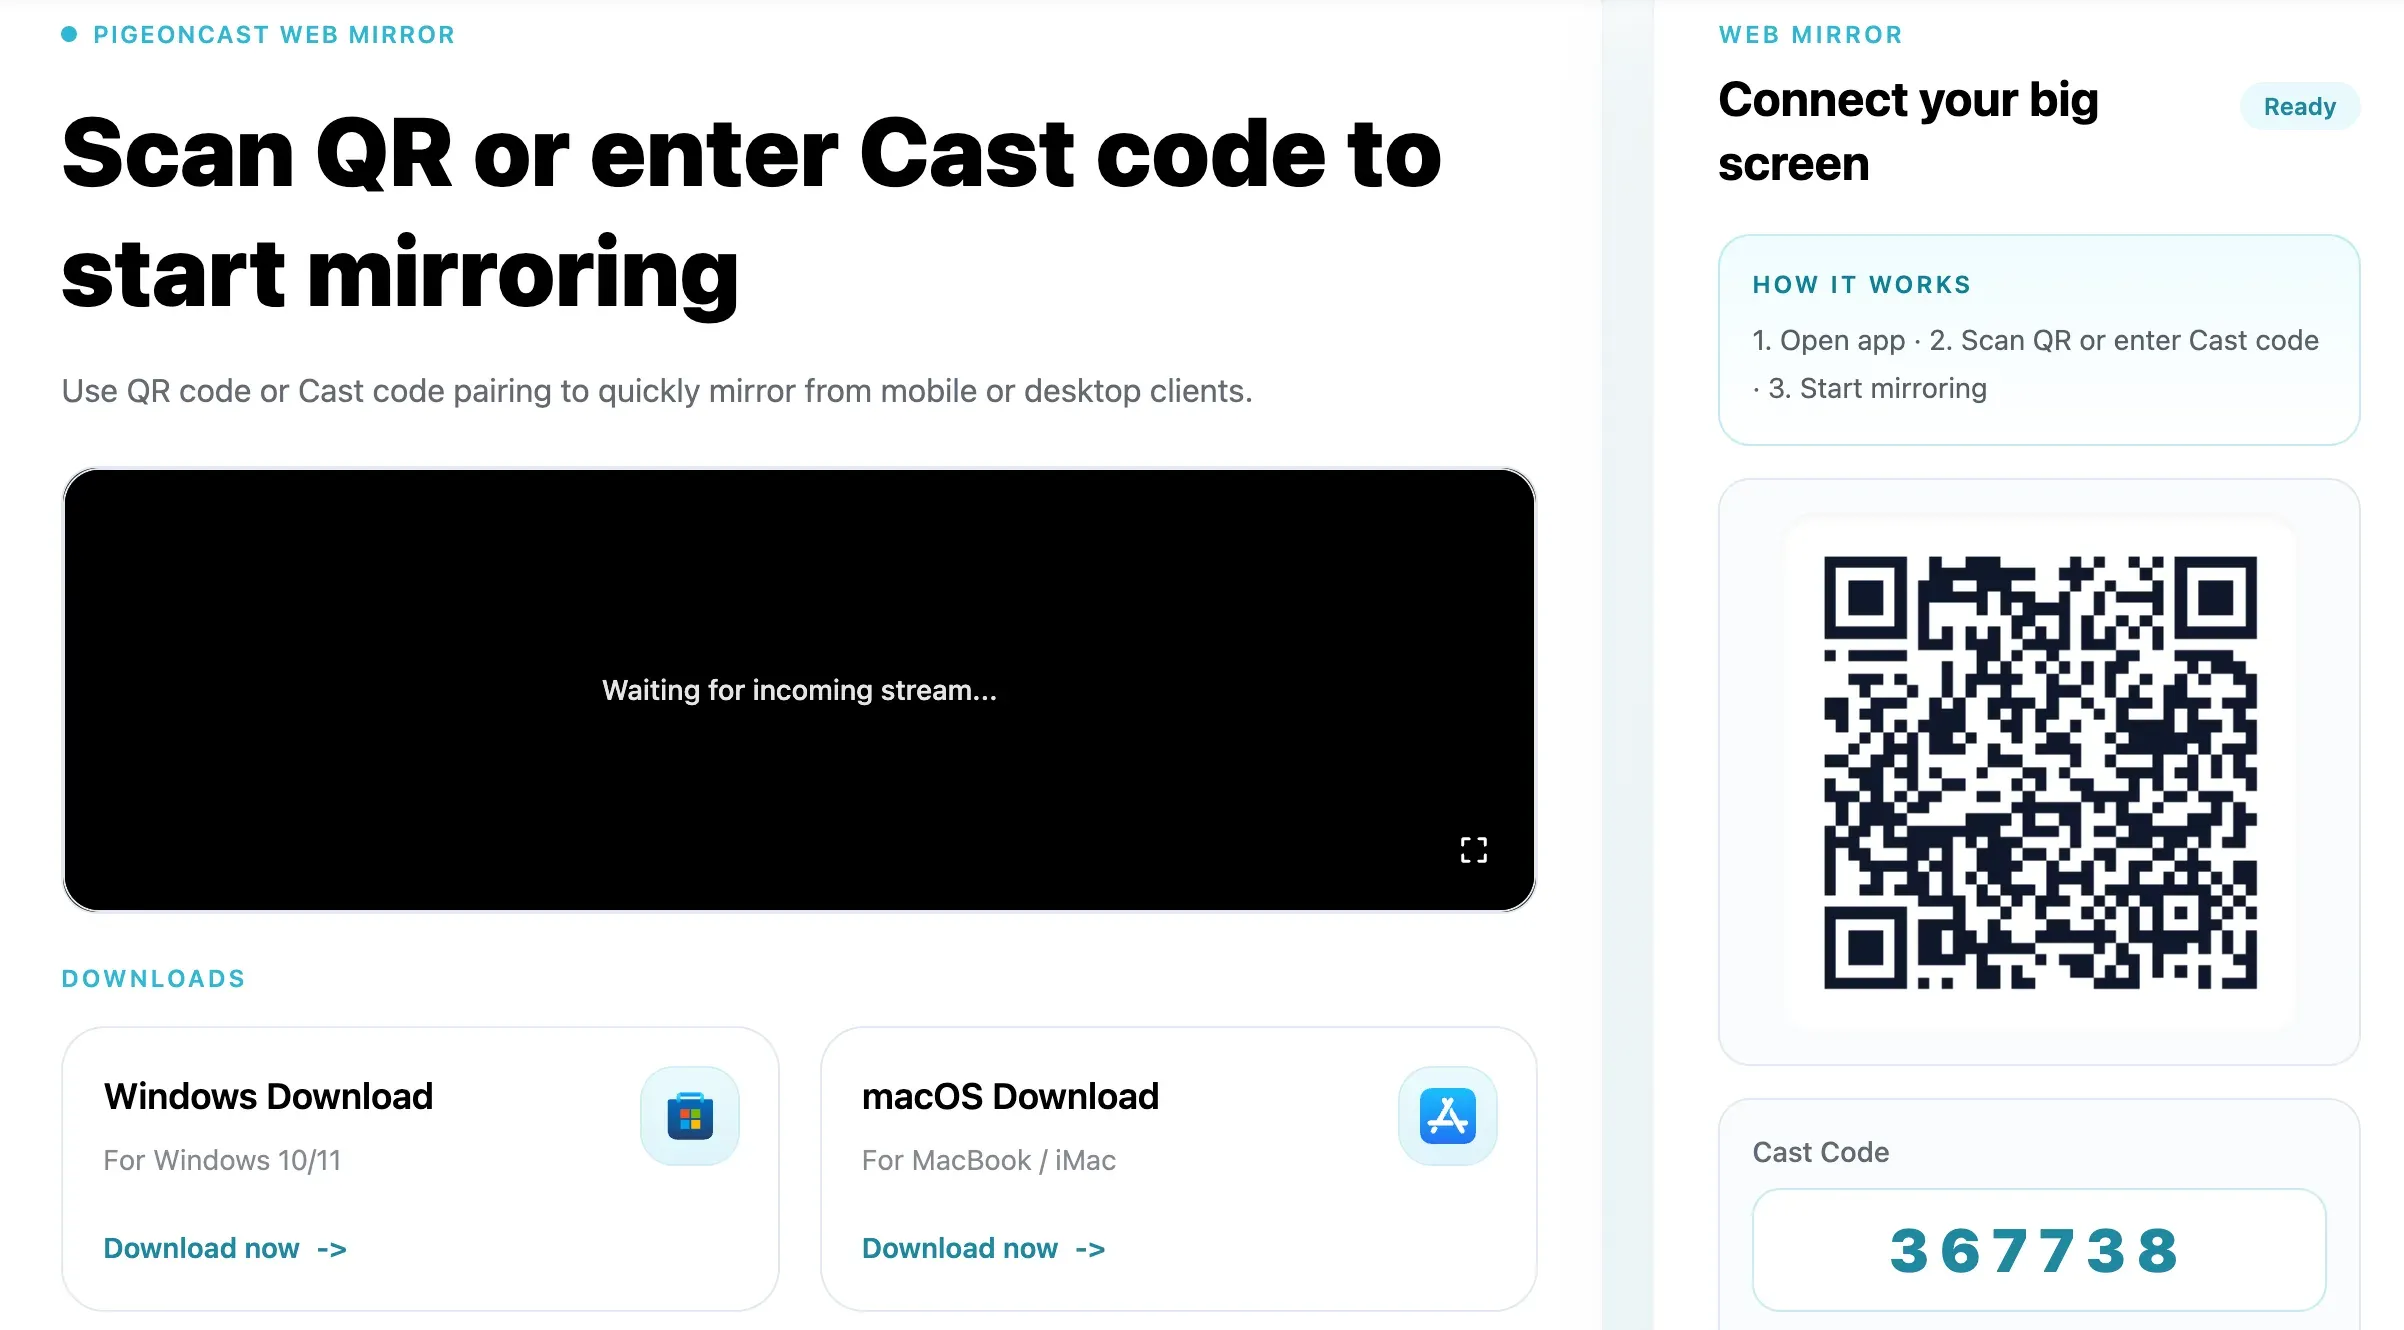
Step 2. Visit the browser-based receiver platform.
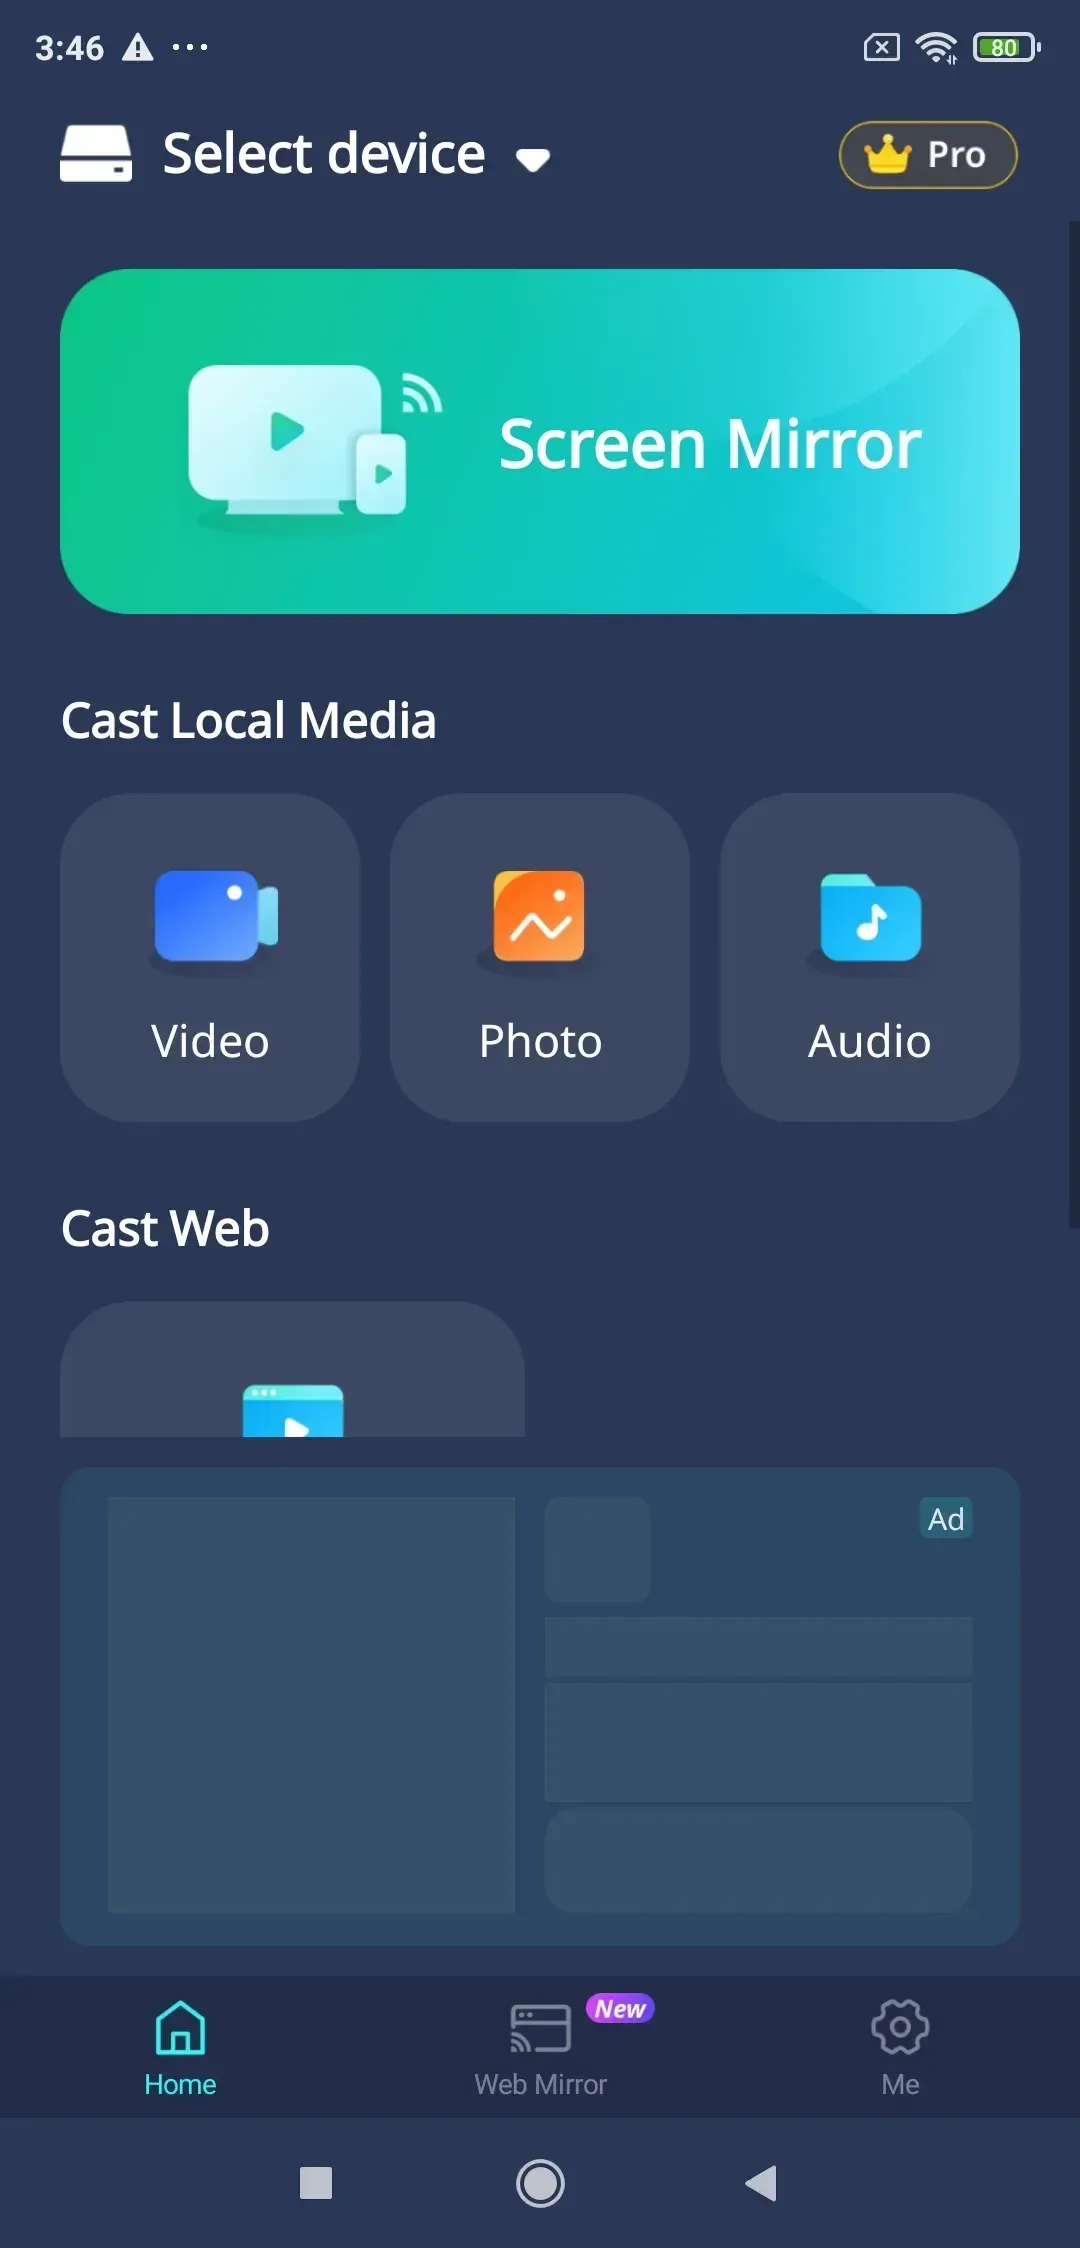
Step 3. Download and install PigeonCast app on your phone and esnure it connects to the same network as your Raspberry Pi.


Overall Rating:



Step 4. Open the screen mirroring app and switch to the Web Mirror tab.
Step 5. Type the code displayed on the webpage or scan the QR code.
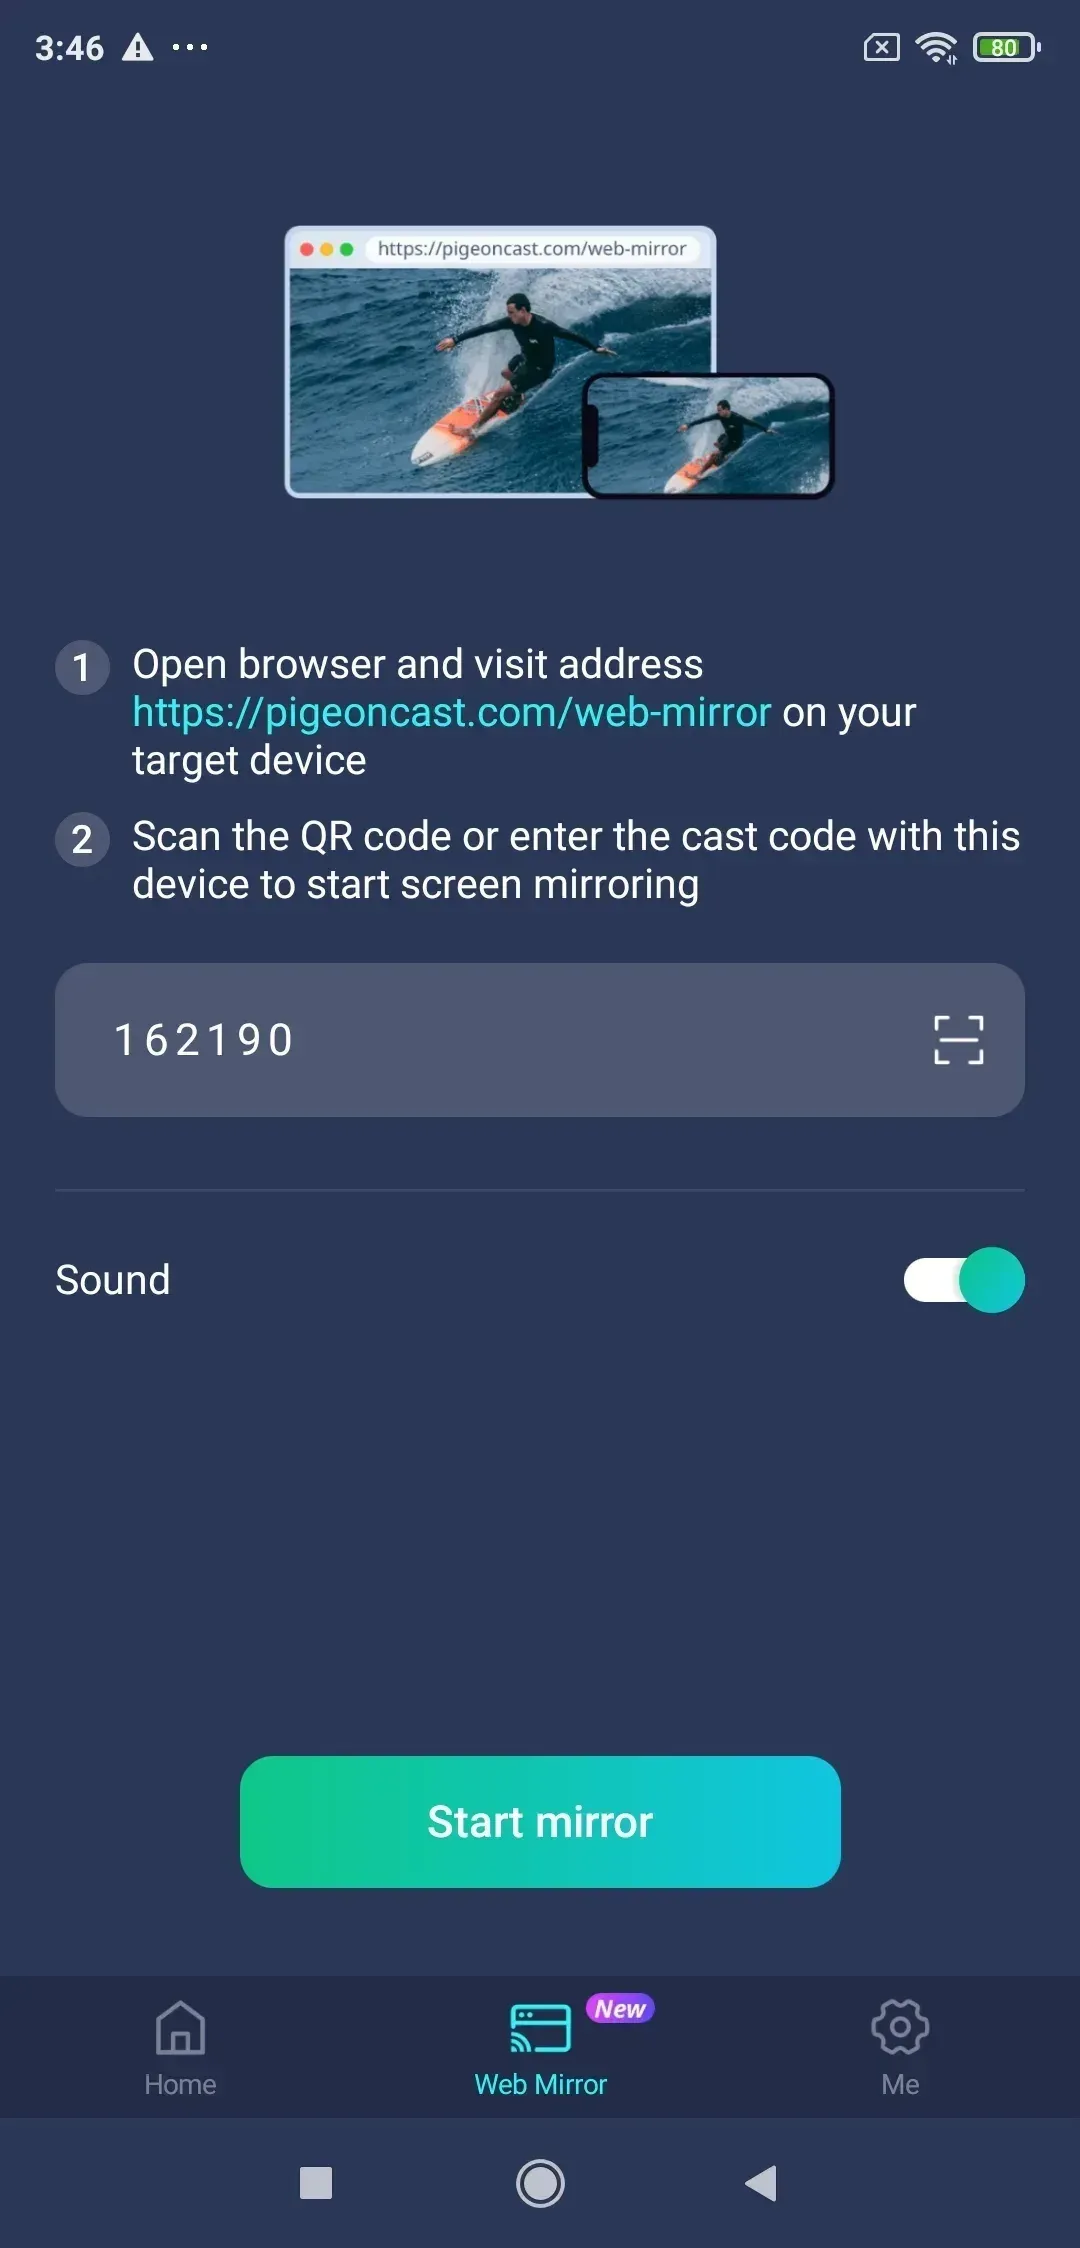
Step 6. Tap the Start mirror option and watch your phone screen in the browser.
Other Ways to Use a Raspberry Pi as a Wireless Display
If the main receiver methods above do not fit your setup, these are the other realistic options.
Use the Pi for One Device Family Only
This is often the smartest move.
Instead of asking one Pi to receive from every device in the house, decide that it will be:
- an AirPlay receiver for Apple devices
- or a Miracast-style receiver for one Windows or Android setup
That lowers the amount of troubleshooting and makes the Pi easier to keep working.
Use Ethernet for the Pi If Wi-Fi Is Weak
Even when the sender is wireless, the Pi itself does not have to be on Wi-Fi. If the Pi is close to the router, wired Ethernet can reduce network trouble on the receiver side.
That will not solve protocol mismatch, but it can help with stability once the right receiver software is already in place.
Use HDMI From the Sender If Wireless Is Not Worth the Trouble
This is the part many guides skip, but it matters.
Sometimes the right answer is to stop chasing wireless receiving on the Pi and just connect the sender by cable. If the screen needs to work for a live demo, a classroom, or a one-time event, a direct cable is often the more sensible choice.
There is no prize for making the Pi do a job that another cable can handle in two minutes.
Common Raspberry Pi Wireless Display Problems
Most failures come from one of four causes: the wrong receiver software, the wrong sending protocol, weak network discovery, or unrealistic expectations about what the Pi supports by default.
The Raspberry Pi Does Not Show Up on the Sender
Many users assume the Raspberry Pi is broken when it does not appear in the sender's device list. In reality, discovery failures are usually caused by protocol mismatch.
For example:
- an iPhone looking for AirPlay will not discover a Miracast receiver
- a Windows laptop using Miracast will not discover a Pi that only has AirPlay software installed
- Google Cast devices will not automatically detect most Pi receiver projects
Before reinstalling software, verify:
- which protocol the sender is using
- which receiver software is running on the Pi
- whether both devices are on the same network
In many cases, simply matching the correct protocol resolves the issue.
The Pi Shows Up but the Screen Never Appears
A successful discovery does not always mean a successful mirroring session.
If the Raspberry Pi appears in the sender's list but the display remains blank, the connection handshake may be completing while video rendering fails.
Common causes include:
- outdated receiver software
- unsupported video codecs
- HDMI display negotiation issues
- insufficient resources on older Pi models
A useful troubleshooting method is to first mirror a static desktop screen instead of video content. If basic mirroring works but video playback fails, the issue is often codec-related rather than network-related.
The Mirroring Session Lags or Stutters
Lag is one of the most common complaints when people use a Raspberry Pi as a wireless display receiver.
In practice, the problem is not always the receiver software itself. I have seen setups where PowerPoint slides and web pages mirrored smoothly, but video playback became noticeably choppy. In those cases, the issue was usually network bandwidth, video encoding overhead, or the Raspberry Pi's processing limitations rather than a broken mirroring connection.
A few things are worth checking:
- how far the sender is from the Wi-Fi access point
- whether the Raspberry Pi is using Wi-Fi or Ethernet
- the resolution being mirrored
- CPU usage on the Raspberry Pi during the session
- whether the content is mostly static slides or full-motion video
Older hardware can also be a factor. A Raspberry Pi 3 may handle basic presentations reasonably well, while higher-resolution video streams can push the hardware much harder than many users expect.
If your goal is smooth video playback rather than occasional screen sharing, a dedicated streaming device or native casting hardware may deliver a better experience than a Raspberry Pi receiver setup.
You might be interested in another guide: Why Is Screen Mirroring Lagging? Quick Fixes to Reduce Lags
Audio Does Not Work Correctly
Audio problems can be surprisingly difficult to diagnose because a successful screen mirroring connection does not always mean audio is being transmitted correctly.
For example, I have seen situations where video appeared immediately on the Raspberry Pi display, but no sound came through the connected monitor. In another setup, audio played correctly through the Pi's local output device but never reached the TV connected over HDMI. From the user's perspective, both situations look like "audio is broken", even though the root cause is different.
A useful way to troubleshoot is to think of audio as a separate chain from the video connection:
Sender Device → Receiver Software → Raspberry Pi Audio Output → Monitor or TV
If any part of that chain fails, video may continue working while audio disappears.
Start by checking:
- whether the receiver software supports audio transmission
- the Raspberry Pi's selected audio output device
- HDMI audio settings on the Pi
- whether the monitor or TV actually has working speakers
- volume settings on both the sender and receiver
It is also worth testing with simple system audio before troubleshooting media apps. If the Raspberry Pi cannot play sound locally, screen mirroring software is unlikely to fix the problem.
The key thing to remember is that video-only success does not automatically mean full media mirroring success. Audio often requires separate verification, especially when using third-party receiver projects.
Conclusion
Raspberry Pi wireless display can work, but only after you stop treating the Pi like a built-in smart TV receiver. The Pi is better understood as a small computer that can become a receiver when the right software matches the sender.
If you use iPhone, iPad, or Mac, start with an AirPlay receiver such as RPiPlay. If you use Windows or Miracast-friendly Android devices, test a Miracast-style receiver project such as lazycast. If your room has mixed devices and native matching turns into guesswork, a browser receiver on the Pi can be the simpler answer.
That is the real decision: not "Can a Raspberry Pi do wireless display?" but "Which sender am I trying to support, and is the Pi worth using for that job?"
Raspberry Pi Wireless Display FAQ
Can I use Raspberry Pi as a wireless display?
Yes. You can use Raspberry Pi as a wireless display receiver by installing compatible receiver software. The exact setup depends on the sending device and protocol. Apple devices typically use AirPlay receivers such as RPiPlay, while Windows and some Android devices may require Miracast-compatible receiver software. Raspberry Pi OS does not provide universal wireless display receiving out of the box.
Can Raspberry Pi work as an AirPlay receiver?
Yes. Raspberry Pi can function as an AirPlay receiver when software such as RPiPlay is installed. This allows iPhones, iPads, and Macs to mirror their screens to a monitor connected to the Pi. Among all wireless display methods available on Raspberry Pi, AirPlay receiving is generally considered one of the most mature and reliable.
Can Raspberry Pi work as a Miracast receiver?
Yes, but support is less standardized than AirPlay. Raspberry Pi can be configured as a Miracast receiver using projects such as lazycast, but compatibility varies depending on the Raspberry Pi model, operating system version, sender device, and network configuration. Success rates are generally more device-dependent than AirPlay setups.
Can I cast Android to Raspberry Pi?
Sometimes. Whether Android can cast to Raspberry Pi depends on the casting technology used by the phone. Some Android devices support Miracast-style wireless display, while others rely primarily on Google Cast. Because Raspberry Pi does not natively support every casting protocol, the correct receiver software must be installed for the specific Android device being used.
What is the easiest way to use Raspberry Pi for screen mirroring?
For Apple devices, installing RPiPlay is usually the easiest approach. For mixed-device environments, a browser-based receiver like PigeonCast can be simpler because it avoids protocol-specific limitations associated with AirPlay, Miracast, and Google Cast.
Can Raspberry Pi replace a Chromecast?
Not completely. Raspberry Pi can replicate some Chromecast-like functions through third-party software, but it does not offer the same native Google Cast integration found on official Chromecast or Google TV devices. Users seeking full Chromecast compatibility may find dedicated casting hardware easier to manage.
Which Raspberry Pi model works best as a wireless display receiver?
Raspberry Pi 4 and Raspberry Pi 5 generally provide the best experience because of their faster processors, improved networking, and better video performance. Older models can work for basic screen mirroring but may struggle with higher resolutions or demanding video content.
Is Raspberry Pi Connect the same as Raspberry Pi wireless display?
No. Raspberry Pi Connect is designed to let you remotely access and control the Pi's own desktop through a web browser. A Raspberry Pi wireless display setup does the opposite: it turns the Pi into a receiver for screen mirroring from devices such as iPhones, Android phones, Windows PCs, or Macs. If you want the Pi to receive a mirrored screen, Raspberry Pi Connect is not the right tool.
Mia Clarke is a technology editor specializing in screen mirroring and casting solutions across multiple platforms. Mia provides clear, practical guides and in-depth insights to help users seamlessly connect their devices. Passionate about enhancing digital experiences, Mia is dedicated to keeping readers updated on the latest trends and tools in cross-platform screen sharing. Whether you’re looking to mirror your smartphone, laptop, or smart TV, Mia’s content delivers reliable, user-friendly advice to simplify your tech setup.