
If you often find yourself juggling multiple apps or working on large projects, one MacBook screen might not cut it. Whether you're editing videos, coding, writing, or presenting, having an extended display setup can significantly boost productivity.
So, how do you do it? If you're searching for "how to extend display on Mac", you're in the right place. In this guide, we'll go through both wired and wireless options, explain how to use macOS extend display properly, and show you how to get the most out of your MacBook with tools.
Method 1. Extend Display with a Single Monitor (Wired Setup)
The most common setup is connecting your MacBook to one external monitor. This gives you a true Mac extend display rather than just mirroring. In this way, you need:
- A MacBook Pro or MacBook Air running macOS.
- An external monitor (HDMI, DisplayPort, or USB-C compatible)
- The right cable or adapter (USB-to-C to HDMI, Thunderblot to DisplayPort, etc.)
Here's how to extend display on MacBook:
Step 1: Check your Mac's ports.
Most modern MacBooks (Pro and Air) come with Thunderbolt/USB-C ports. If your monitor only supports HDMI, you'll need a USB-C to HDMI adapter.
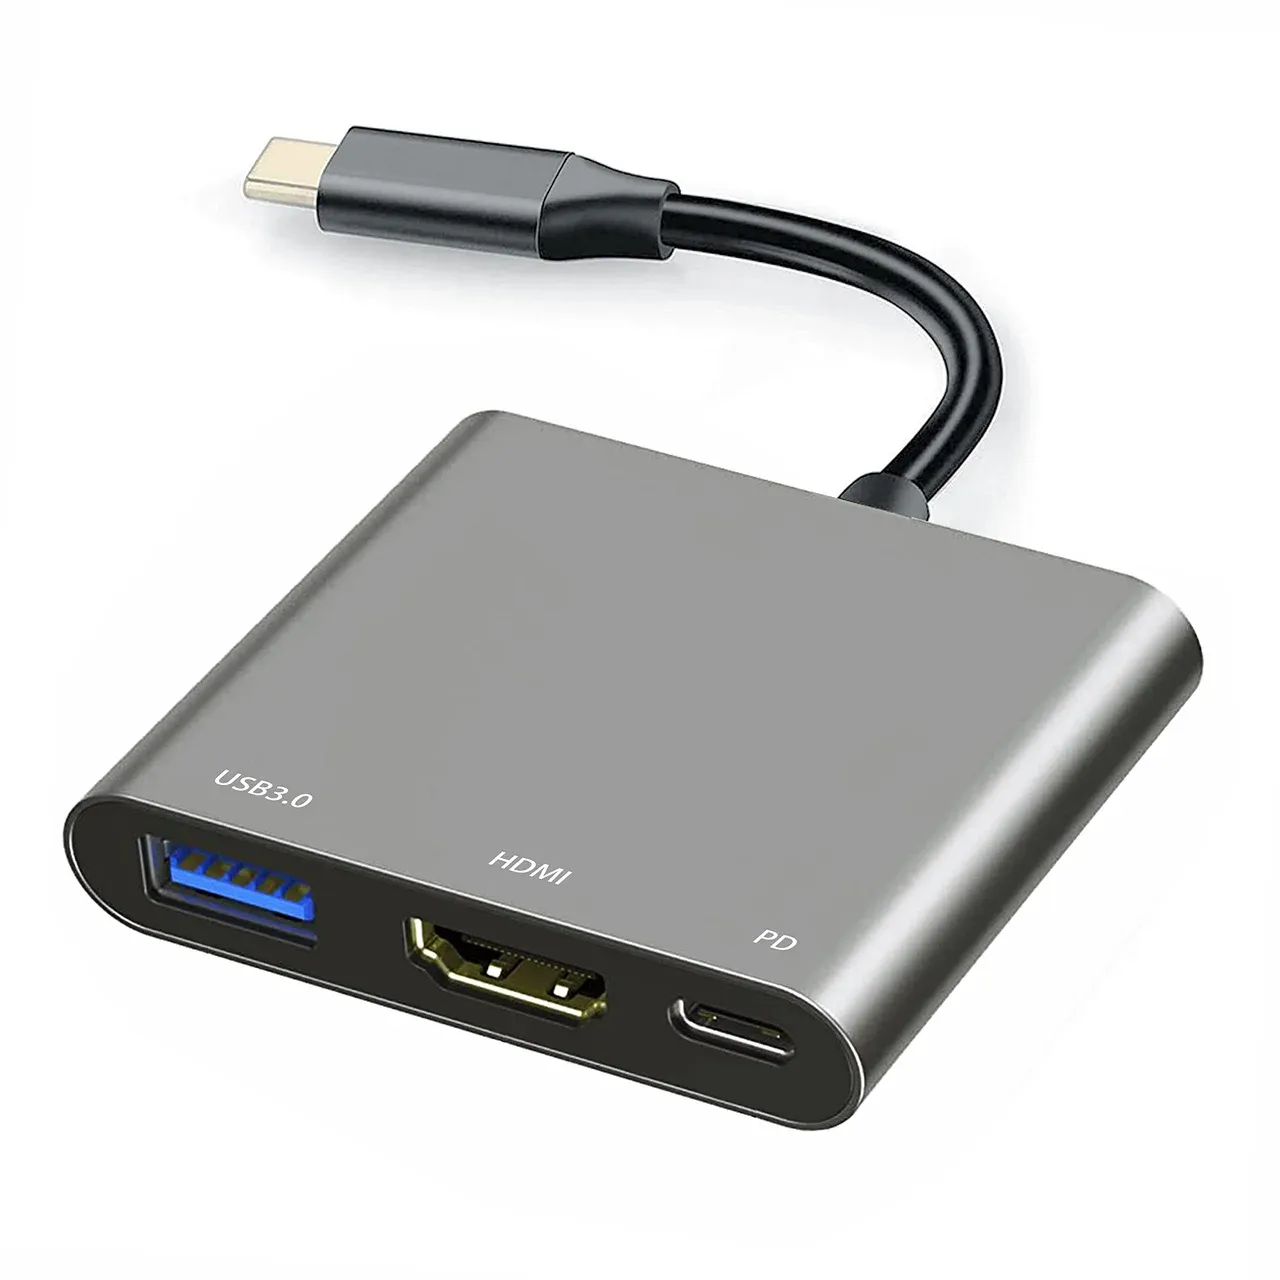
Step 2: Connect MacBook to monitor.
- Plug your MacBook into your external display with the right cable.
- Wait a moment.
- macOS should automatically detect the display.
Step 3: Adjust display settings.
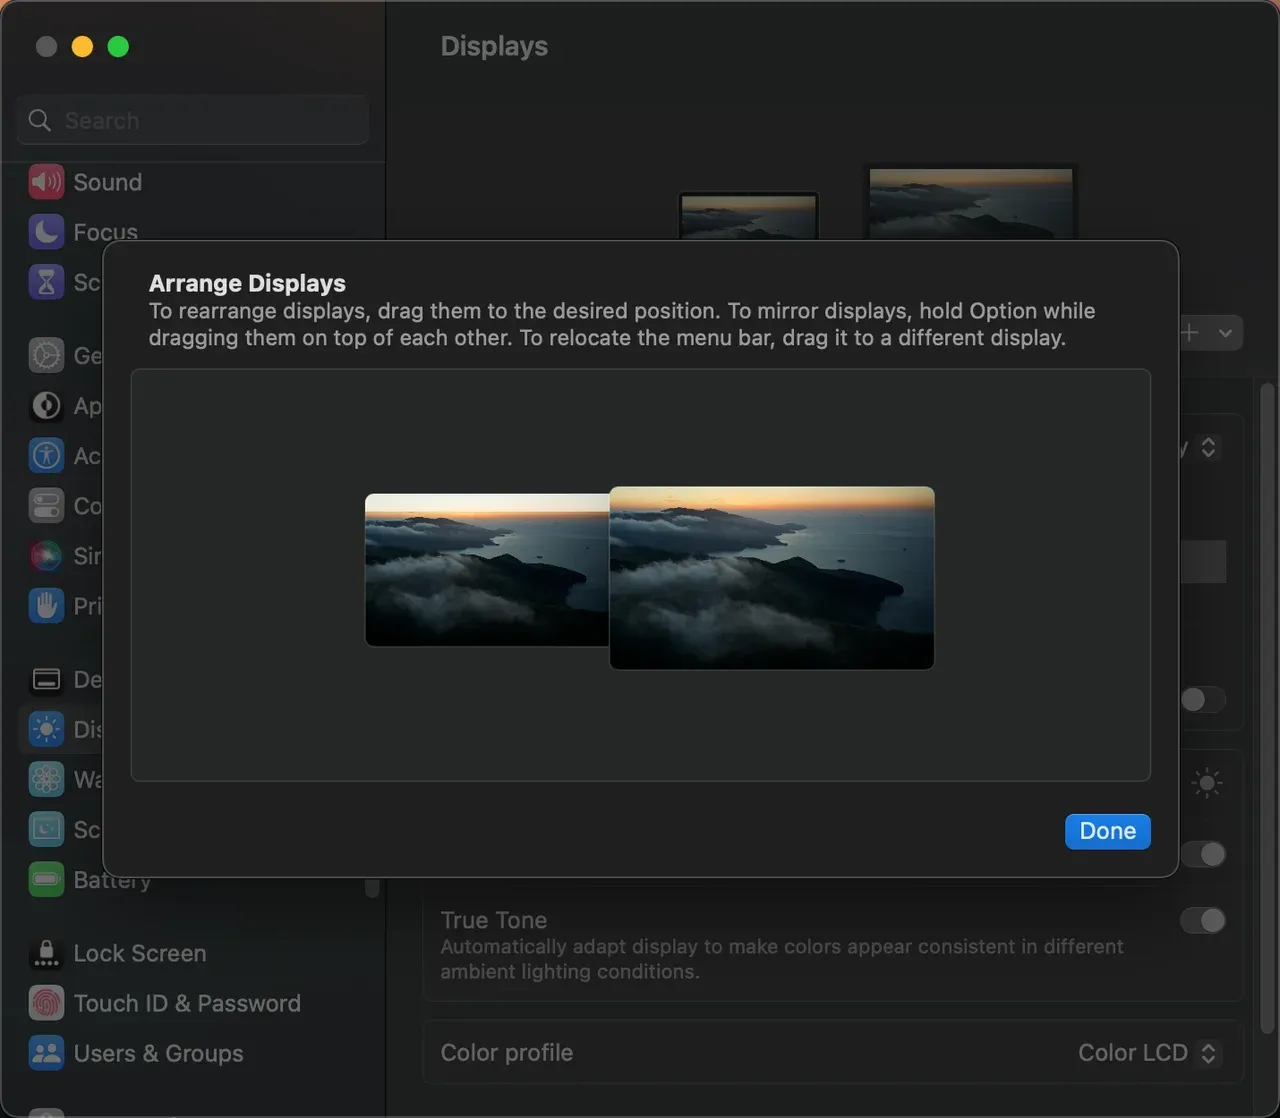
- Go to System Settings > Displays > Arrangement.
- Decide if you want the monitor on the left, right, or above your MacBook screen.
- Press and hold the Option button on your Mac and move your mouse to drag displays to the desired position.
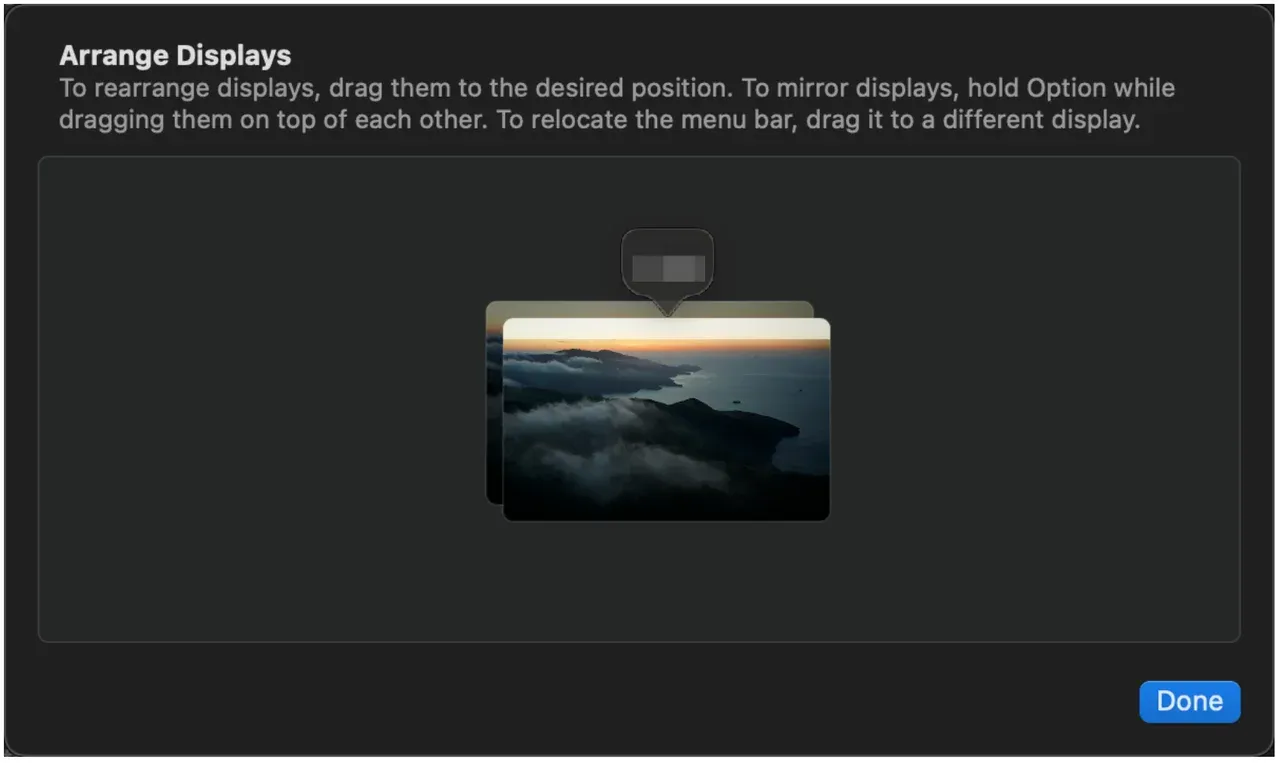
Tip: You can also choose to mirror your Mac here by holding the Option key and dragging the screens on top of each other.
Method 2. Extend Display on Mac to Two Monitors
Need even more workspace? If you're asking "how to extend display on Mac to two monitors", it depends on your MacBook model.
- MacBook Pro with M1 chip (2020) officially supports only one external display, unless you use workarounds (like DisplayLink adapters).
- MacBook Pro with M1 Pro, M1 Max, M2 Pro, M2 Max, or Intel processors supports two or more monitors natively.
- MacBook Air with M1/M2 chips is limited to one external monitor unless you use third-party solutions.
So, how to extend display on Mac to two monitors? The steps are:
Step 1. Connect the first monitor directly via USB-C or HDMI.
Step 2. Connect the second monitor to another port. If your MacBook doesn't have enough ports, use a Thunderbolt dock or hub.
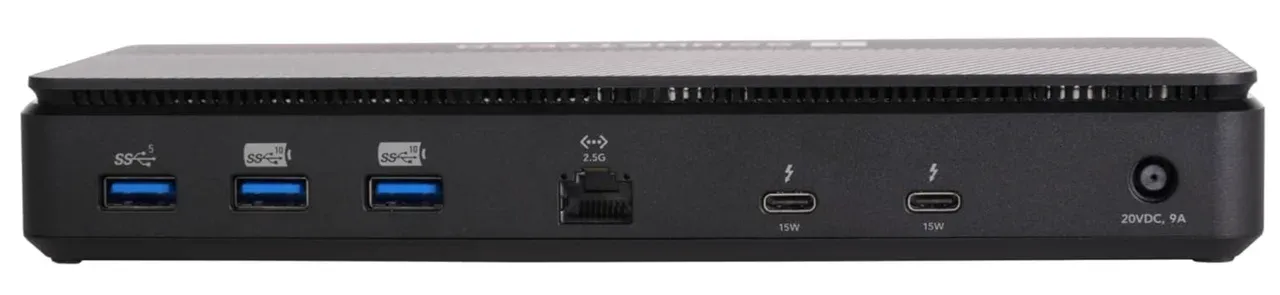
Step 3. On your MacBook, go to System Settings > Displays and arrange all three displays.
Tip: If your Mac only detects one external screen, double-check your MacBook model. You may need a DisplayLink-enabled dock to bypass hardware limits.
Method 3. Extend Display Wirelessly with PigeonCast
If cables aren't your thing, you can go wireless. Mac's built-in AirPlay lets you mirror your Mac's screen to an Apple TV or compatible smart TV. But what if you want more options — like mirroring to an Android TV, Fire TV, Windows PC, or even another Mac? That's where PigeonCast comes in.
What is PigeonCast:
PigeonCast is a free, lightweight mirroring and casting app for macOS. It supports multiple protocols:

- AirPlay (Apple devices)
- Google Cast (Chromecast, Android TV)
- DLNA (many smart TVs and media Players)
- PigeonCast (proprietary protocol by FalconAI)
Why use PigeonCast for Mac extend display:
- Cross-platform compatibility: Mirror your MacBook to almost any smart TV or computer.
- Easy setup: Just install the app and connect over Wi-Fi.
- Better flexibility: Works with MacBook Pro, MacBook Air, Apple TV, Android TV, and Fire TV.
How to extend screen on Mac with PigeonCast:
Step 1. Download and install the app PigeonCast for Mac.

PigeonCast Screen Mirroring

Official Download


Step 2. Launch the app and make sure your Mac and target device, like TV, are on the same Wi-Fi.
Step 3. Choose Send my screen option on the app and your device from the list.
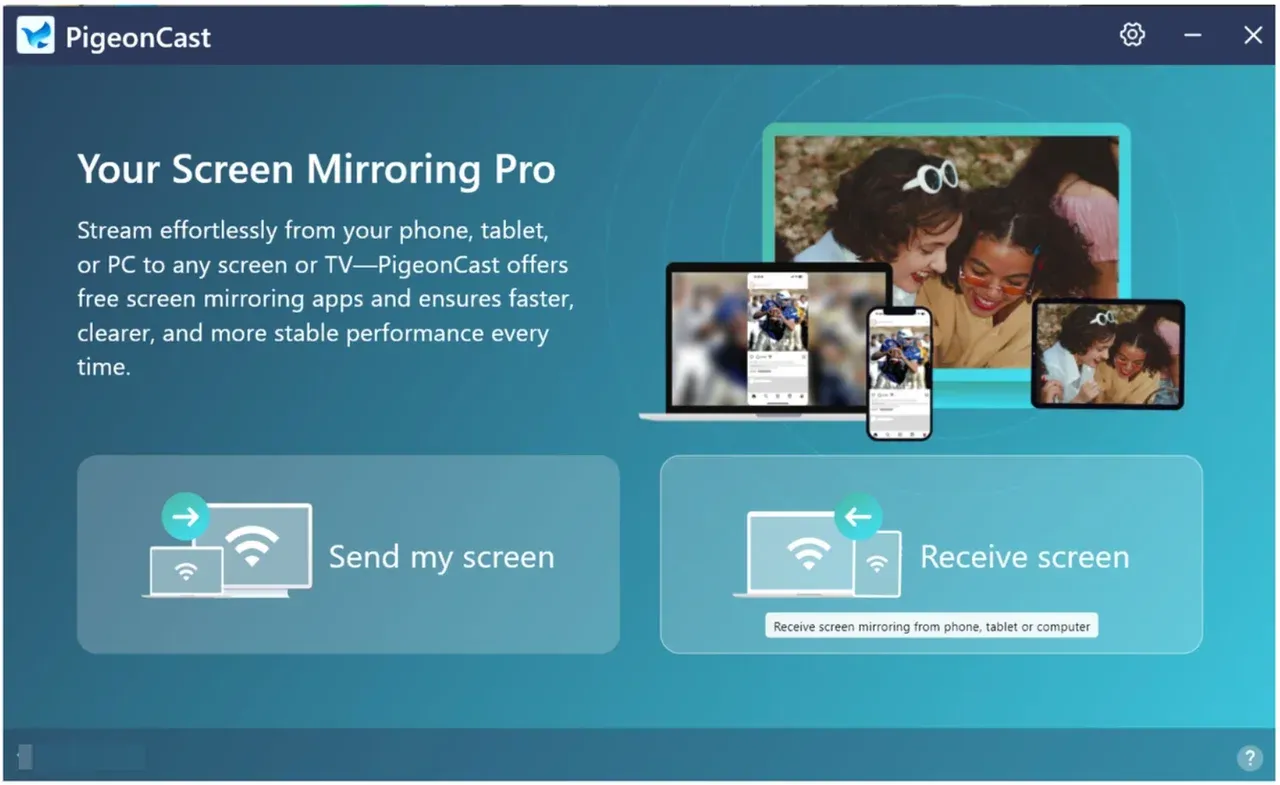
Step 4. Follow the onscreen instructions to cast content to another screen. Then you can still use your Mac without interrupting the casting.
Method 4. Use Mac Screen Mirroring for Presentations
Sometimes you don't need an extended workspace; you just want your screen duplicated on a bigger display. This is where Mac screen mirroring comes in handy. Here's how to mirror Mac to TV:
- On your MacBook, click the Control Center in the menu bar.
- Select Screen Mirroring (or the AirPlay icon).
- Choose your TV, Apple TV, or AirPlay device.
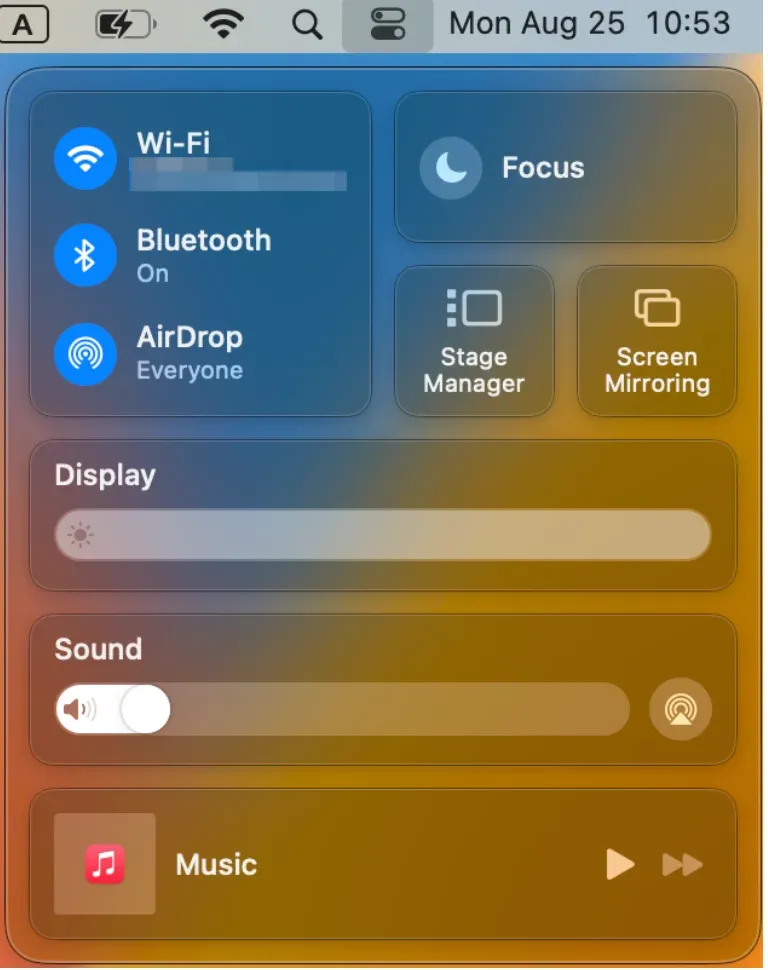
This option is best for watching videos, sharing slides, or presenting to a group. Just keep in mind it's not the same as macOS extend display.
Mac Extend Display vs. Mac Screen Mirroring
To clear up confusion:
- Mac Extend Display: adds a separate workspace. Ideal for productivity and multitasking.
- Mac Screen Mirroring: shows the exact same screen on another display. Great for sharing content.
Think of extending as adding more desk space, while mirroring is like holding up a mirror to your current desk.
Tips for a Smooth Multi-Display Experience
- Use the right cables/adapters: Check your MacBook model's ports before buying a monitor.
- Invest in a docking station: If you're running multiple displays, a Thunderbolt dock simplifies cable management.
- Adjust resolution and scaling: Under Displays settings, you can set each monitor's resolution for the best viewing experience.
- Keep your MacBook cool: Driving multiple monitors can heat things up. A cooling stand helps during long sessions.
Final Thoughts
Whether you're using a MacBook Pro or a MacBook Air, knowing how to extend display on MacBook Pro can transform your workflow.
- Use a single wired monitor for the simplest setup.
- Try two external monitors if your MacBook supports it.
- Go wireless with PigeonCast for flexibility across TVs and devices.
- Stick to Mac screen mirroring when you just need to share your screen.
In short, Mac extend display isn't just about more pixels — it's about working smarter, staying organized, and unlocking your MacBook's full potential.
How to Extend Display on Mac FAQs
Q: What is the shortcut to extend the display on a Mac?
There isn't a single universal shortcut, but you can quickly manage displays by pressing Command (⌘) + F1 on some Mac models to toggle mirroring on/off. For more precise control, go to System Settings > Displays, where you can choose to mirror or extend your Mac screen.
Q: Why is my Mac not recognizing my second monitor?
Common reasons include a loose cable connection, an incompatible adapter, or outdated macOS graphics drivers. First, double-check that the cable and adapter are secure. Then go to System Settings > Displays > Detect Displays. If it still doesn't work, try restarting your Mac or testing with another cable/monitor.
Q: Can a MacBook Air support two monitors?
By default, most MacBook Air models (especially the M1 chip version) support only one external monitor. However, Intel-based MacBook Air models and the newer M2 MacBook Air can support two displays, though it often requires a docking station or DisplayLink adapter for dual-monitor setups.
Q: How do I switch to an external monitor on my MacBook?
Connect your MacBook to the monitor via HDMI, DisplayPort, or USB-C. Once connected, your Mac should automatically detect the display. If you want to use only the external screen, close the MacBook lid while it's connected to power and an external keyboard/mouse — this is called clamshell mode. You can also rearrange or select "Mirror Display" in System Settings > Displays.
Q: Can I extend my MacBook display wirelessly?
Yes, you can use AirPlay to extend or mirror your Mac's display to an Apple TV or AirPlay-enabled smart TV. For more versatile wireless options, third-party apps like PigeonCast let you mirror or cast your Mac screen to various devices (though it mirrors, not truly extends).
Q: How to connect MacBook to monitor without HDMI?
If your monitor doesn't support HDMI, you can use USB-C to DisplayPort, VGA, or DVI adapters depending on the available ports. Many modern monitors also support direct USB-C connections, which carry both video and power.
Q: Does macOS extend display work with iPad?
Yes! With Sidecar, you can use your iPad as a second display for your Mac. Just connect wirelessly via Bluetooth/Wi-Fi or use a USB-C cable, then enable Sidecar from System Settings > Displays.
Q: Why does my extended display look blurry on Mac?
This often happens when the external monitor resolution doesn't match your Mac's default scaling. Go to System Settings > Displays > Resolution, and choose "Scaled" to adjust sharpness. Some third-party monitors may need additional drivers for proper scaling.
Mia Clarke is a technology editor specializing in screen mirroring and casting solutions across multiple platforms. Mia provides clear, practical guides and in-depth insights to help users seamlessly connect their devices. Passionate about enhancing digital experiences, Mia is dedicated to keeping readers updated on the latest trends and tools in cross-platform screen sharing. Whether you’re looking to mirror your smartphone, laptop, or smart TV, Mia’s content delivers reliable, user-friendly advice to simplify your tech setup.